FAST Screen Printing with Stencils: Make a Cool T-Shirt or Tote by Leitha Matz |
Artists & CareersTHE TASK:
- Click on the link "Contemporary Screen-Printers" At the top there are 8-10 well-known artists who are known for their work in silk screen designs. Click around and see which 3 artist(s) you find most interesting. - Using their name or other key words, research the 3 ARTISTS you chose and answer the questions on the doc in Google Classroom. - Click on the "Careers/Jobs" button and PDF, conduct some further research and answer the questions on the doc in Google Classroom. - Watch Lesson 4 & 5 in Skill Share |
| ||
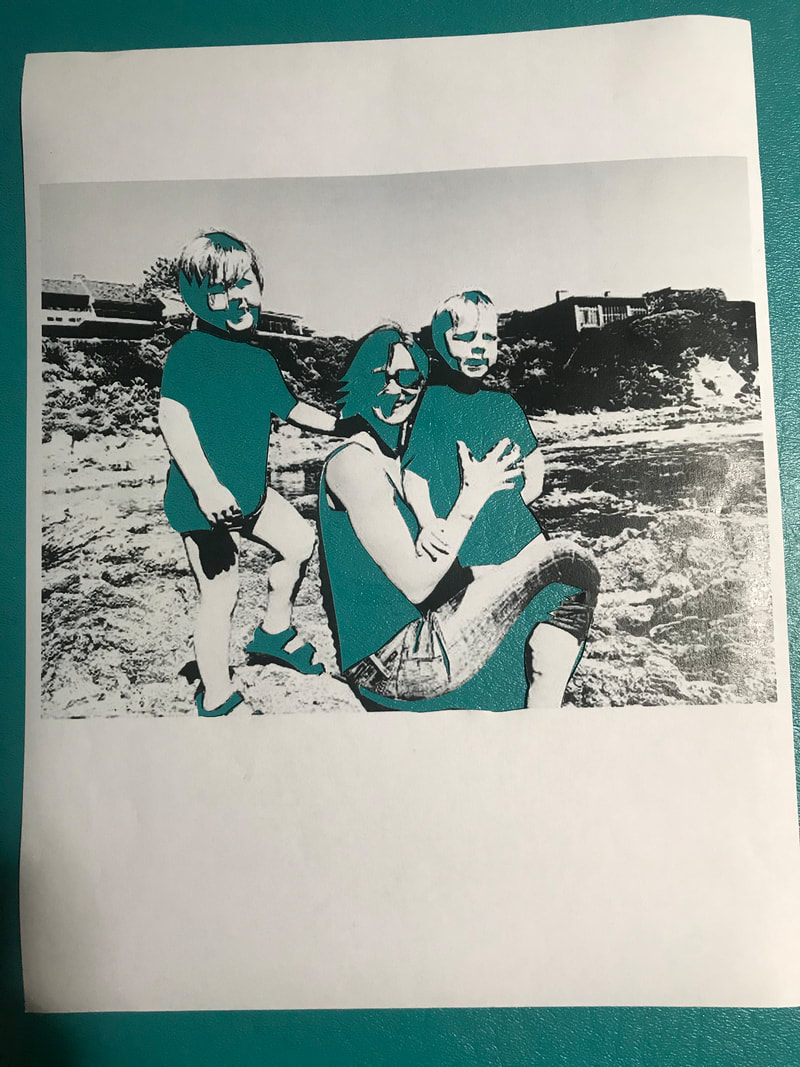
THE TASK: (YOU WILL NEED TO have a PRINTER for this assignment) - Please let me know ASAP if you do not have access to a printer. ON THE CLASSWORK TAB you will POST 3 images (see instructions below)
- Watch skillshare lesson 6 (Create a Stencil from a Photo) & 7 (Cutting the Stencil)
- Use the step-by-step images below to create your own stencil design.
- Save your photopea image as a Jpeg (and post it to the classwork tab)
- Print your image (2 or more copies)
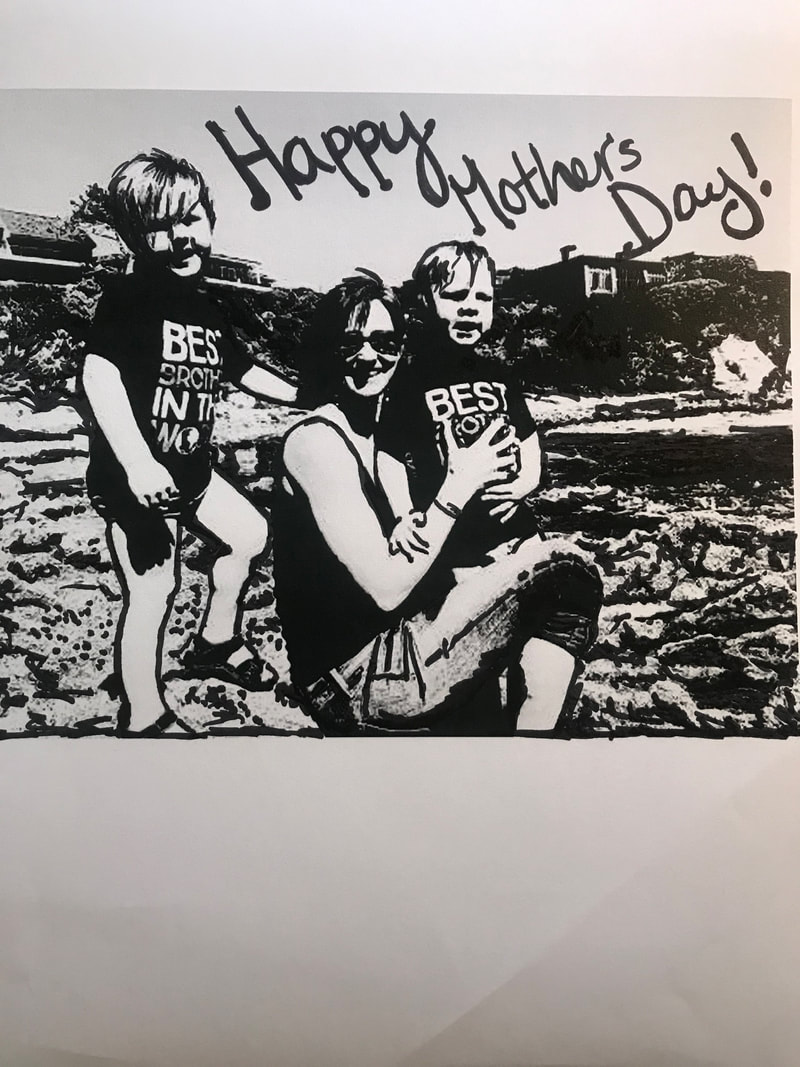
- Cut one copy as a stencil - REMOVE THE BLACK PARTS OF THE DESIGN (SO THAT INK CAN PASS-THROUGH) Do your best to keep the white shapes connected. MY EXAMPLE IS WAAAAAY TOO DETAILED - I recommend you
do something more simple and simplify the design as you cut.
- For the 2nd copy, I want you to take a sharpie or black permanent pen and go over any grey-tone areas and thicken
details so that it could work for a photo emulsion design (if we were able to do this project that way).
- LASTLY - Photograph BOTH the cut-out and the sharpied designs and POST the photo to the classwork tab.
- Watch skillshare lesson 6 (Create a Stencil from a Photo) & 7 (Cutting the Stencil)
- Use the step-by-step images below to create your own stencil design.
- Save your photopea image as a Jpeg (and post it to the classwork tab)
- Print your image (2 or more copies)
- Cut one copy as a stencil - REMOVE THE BLACK PARTS OF THE DESIGN (SO THAT INK CAN PASS-THROUGH) Do your best to keep the white shapes connected. MY EXAMPLE IS WAAAAAY TOO DETAILED - I recommend you
do something more simple and simplify the design as you cut.
- For the 2nd copy, I want you to take a sharpie or black permanent pen and go over any grey-tone areas and thicken
details so that it could work for a photo emulsion design (if we were able to do this project that way).
- LASTLY - Photograph BOTH the cut-out and the sharpied designs and POST the photo to the classwork tab.
|
|
Everything below this point is still in process...stay tuned!
Materials & SuppliesHaving the right materials and supplies is critical to success with any visual art project. For this step of the assignment I want you to put together a "mock order" at a local silk screen supply store. Below are links to websites I regularly use when ordering supplies for the class. I DO NOT WANT YOU TO ACTUALLY PURCHASE SUPPLIES, but configure the shopping cart, and save it as a PDF then post it to this classwork tab. Expect to spend
THE TASK: - Watch lesson 8 in skillshare - Review the supply list PDF and my comments (supplied by the skillshare teacher) - Click on the Dick Blick Art or McLogan Supply websites and assemble a shopping cart with the necessary supplies you would need for this project. |
Make a Test Print
THE TASK:
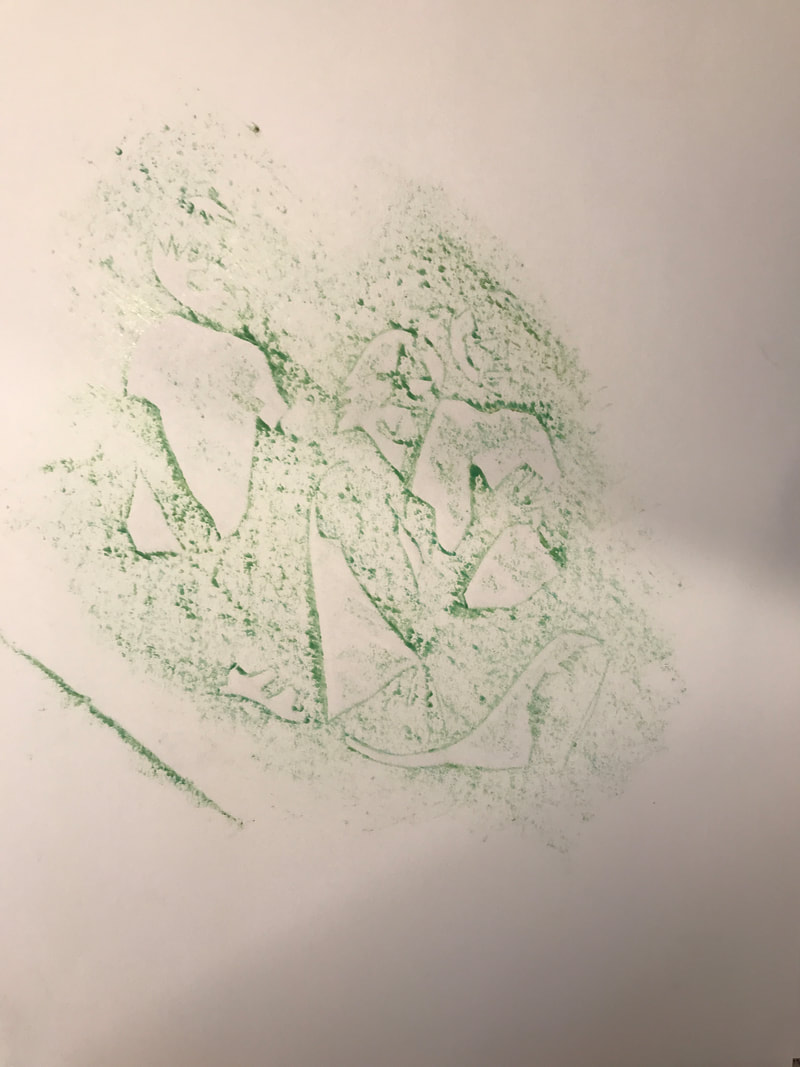
- For this assignment I want you to test "print" your stencil using the frottage and the coloring in techniques.
- BE VERY CAREFUL! You are not yet finished with your stencil and you don't want to rip it and have to re-cut it.
- To do the frottage- find a clean, dry, smooth surface (i used my kitchen counter). Take a fresh piece of paper and a
dark colored crayon (without the paper) or a dull pencil if you don't have a crayon.
- place your cut stencil on the counter (facing the way you want it to print), place your fresh paper on top, you may
want to use a piece of tape or two to keep the papers from sliding.
- Use the side of the crayon to carefully and consistently make a rubbing of your stencil design. You should find that
the areas you cut out will be light and the other areas will be dark.
- Photograph your frottage, upload it to google drive (rename it your name-frottage), and post it to this classwork tab.
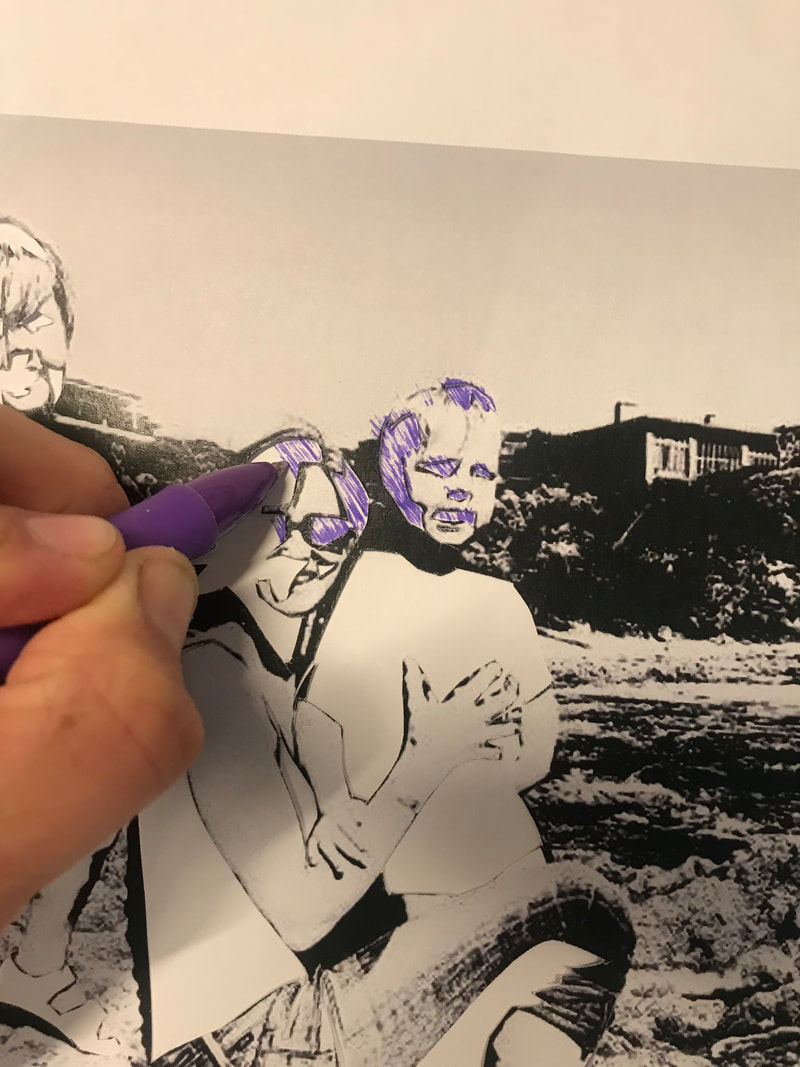
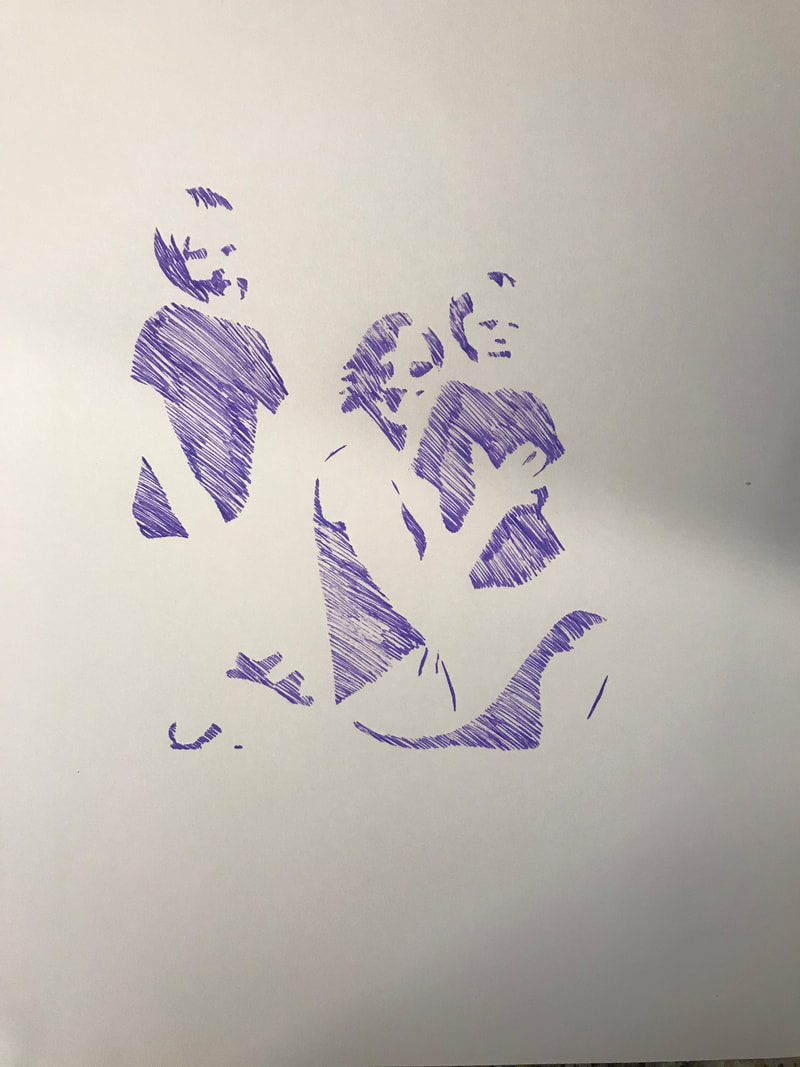
- For the next "test print," you will place the paper under your stencil, and carefully with a dull pencil, or pen fill in the
open shapes that you have cut. BE CAREFUL NOT TO RIP IT, or you will have to recut the stencil for the final prints.
- Photograph your stencil print, upload it to google drive (rename it your name-stencil), and post it to this classwork tab.
- For this assignment I want you to test "print" your stencil using the frottage and the coloring in techniques.
- BE VERY CAREFUL! You are not yet finished with your stencil and you don't want to rip it and have to re-cut it.
- To do the frottage- find a clean, dry, smooth surface (i used my kitchen counter). Take a fresh piece of paper and a
dark colored crayon (without the paper) or a dull pencil if you don't have a crayon.
- place your cut stencil on the counter (facing the way you want it to print), place your fresh paper on top, you may
want to use a piece of tape or two to keep the papers from sliding.
- Use the side of the crayon to carefully and consistently make a rubbing of your stencil design. You should find that
the areas you cut out will be light and the other areas will be dark.
- Photograph your frottage, upload it to google drive (rename it your name-frottage), and post it to this classwork tab.
- For the next "test print," you will place the paper under your stencil, and carefully with a dull pencil, or pen fill in the
open shapes that you have cut. BE CAREFUL NOT TO RIP IT, or you will have to recut the stencil for the final prints.
- Photograph your stencil print, upload it to google drive (rename it your name-stencil), and post it to this classwork tab.
|
|
|
